For me, thriftiness isn’t something that is only limited to my fashion decisions. I try really hard to find affordable alternatives whenever I can in life: instead of breaking the bank on a fancy meal, I sit at the bar and order appetizers. Instead on splurging on over-priced furniture, I head straight to Ikea (god bless those Swedes!).
And sometimes my work-arounds come in the form of do-it-yourself projects. It’s amazing how a little elbow grease and determination can save you money. So I’ve decided to start sharing some of my best DIY tricks on Style Me Thrifty. First up: do-it-yourself wedding signs!

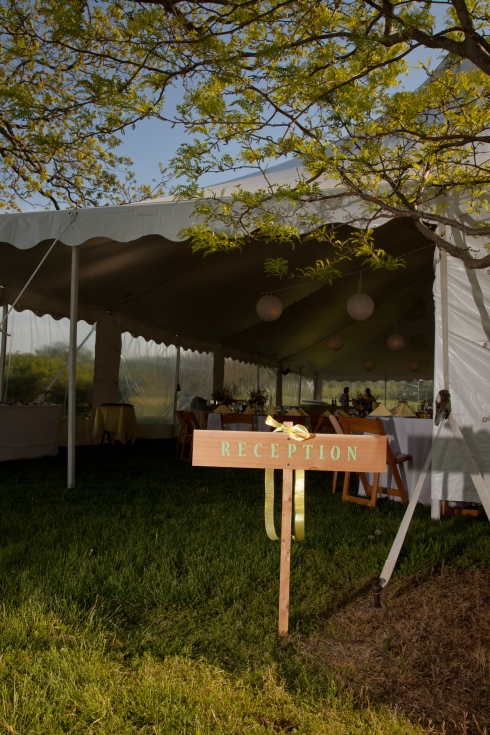
My sister got married in April and her wedding gave me an excuse to start following wedding blogs (how convenient!). One lovely detail I kept seeing in photos were these rustic, directional signs that guided guests to the ceremony, reception, etc. Since my sis was getting married on a farm, wedding signs like these were practically a must, but why would I buy pre-made signs when I could make them myself? So that’s exactly what I did! Here’s how.

Supplies for DIY Wedding Signs:
- 4 pieces of wood, approximately 3 feet long, 6 inches tall, found at Home Depot or a craft store. It doesn’t matter if the pieces aren’t a perfect match or have rough edges. They’re supposed to be “rustic” looking. Bonus tip: if your boyfriend owns a saw, put him to work.
- Paint – I used two 2oz. bottles of acrylic paint from Michael’s and that was more than enough
- Stencils (they make an amateur artist’s life easier) and a stencil brush
- Tape to hold stencils in place
- Ruler
- Nails for mounting the signs to trees OR 4 stakes (about 4 feet tall) to hammer the signs into the ground

Steps to Make the Signs:
- Cut out each letter from the stencil sheet. Using a ruler, find the midpoint of the wood. Now line up your letters so that they’re nice and centered (and spelled correctly!).
- Tape each stencil to the wood to prevent it from moving. Using a stippling motion, paint in the stencil, making sure you’re putting down enough paint to make the color really vivid.
- Carefully peel off the stencil and continue until you’ve spelled your word. Viola! That’s it!


Tags: arts and crafts, DIY, DIY wedding, wedding, wedding signs


